Why Cabling Matters More Than People Think
When I was building my house, everyone talked about paint colors and floor tiles. Nobody mentioned ethernet cables.
But here is the thing — you can swap your router, your switch, your access points. You can replace every piece of hardware on the network. What you cannot change is what is inside the walls. Bad cable runs, missing conduits, wrong terminations — those stay with you forever.
I had one chance to get it right, and that was before the plaster went up. So instead of jumping straight to VLANs and firewalls. I am starting where I started: cables and conduits.
Hard Cable vs Soft Patch Cable
There are two types of ethernet cable and they are built for different things.
Solid-core cable: (also called hard cable) is what goes inside walls, ceilings, and conduits. Conductors are of thick copper wire, which makes the cable stiff but stable over long runs. You install it once and forget about it.
Stranded patch cable: is for short, flexible connections — patch panel to switch, wall socket to laptop. The conductors are many thin wires twisted together, so the cable bends easily.
Every cable inside my walls is solid-core Cat6.
Cat6 Through the House
I ran Cat6 to every room in the house. Both floors, the basement gym, and the roof.
The plan was straightforward. Every room gets at least one ethernet port. Rooms where I knew I would have more devices — office, living room — got two. The basement gym needed a cable because there is no cell phone coverage down there, so the access point is the only way to get internet.
Before routing any cable, I mapped out two things: where the access points would go and where the cameras would go.
Access points go on the ceiling. That means a cable from the central network point to each AP location, through the ceiling. I planned these positions based on coverage — one per floor plus one for the basement. Each AP connects via PoE, so one cable handles both data and power.
Cameras need cables too. Reolink cameras meant twelve cable runs to specific locations around the bulding — corners, entrance, garage, perimeter. All PoE as well, so one cable per camera.
Why Cat6 and not Cat6A: For a house, Cat6 is more than enough. Cat6 handles 1 Gbps up to 100 meters and even 10 Gbps at shorter distances. Cat6A would give me full 10 Gbps at 100 meters, but no device in my network needs that right now. Cat6A cable is thicker, stiffer, harder to pull through conduits, and more expensive. I ended up with a lot of cables converging in two places. More on that in the rack section.
RJ45 Plugs vs Keystone Jacks
When a cable reaches its destination — wall, patch panel, camera mount — you need to terminate it. There are two main ways.
RJ45 plug: You crimp an RJ45 connector directly onto the cable. The cable then plugs straight into a device or switch.
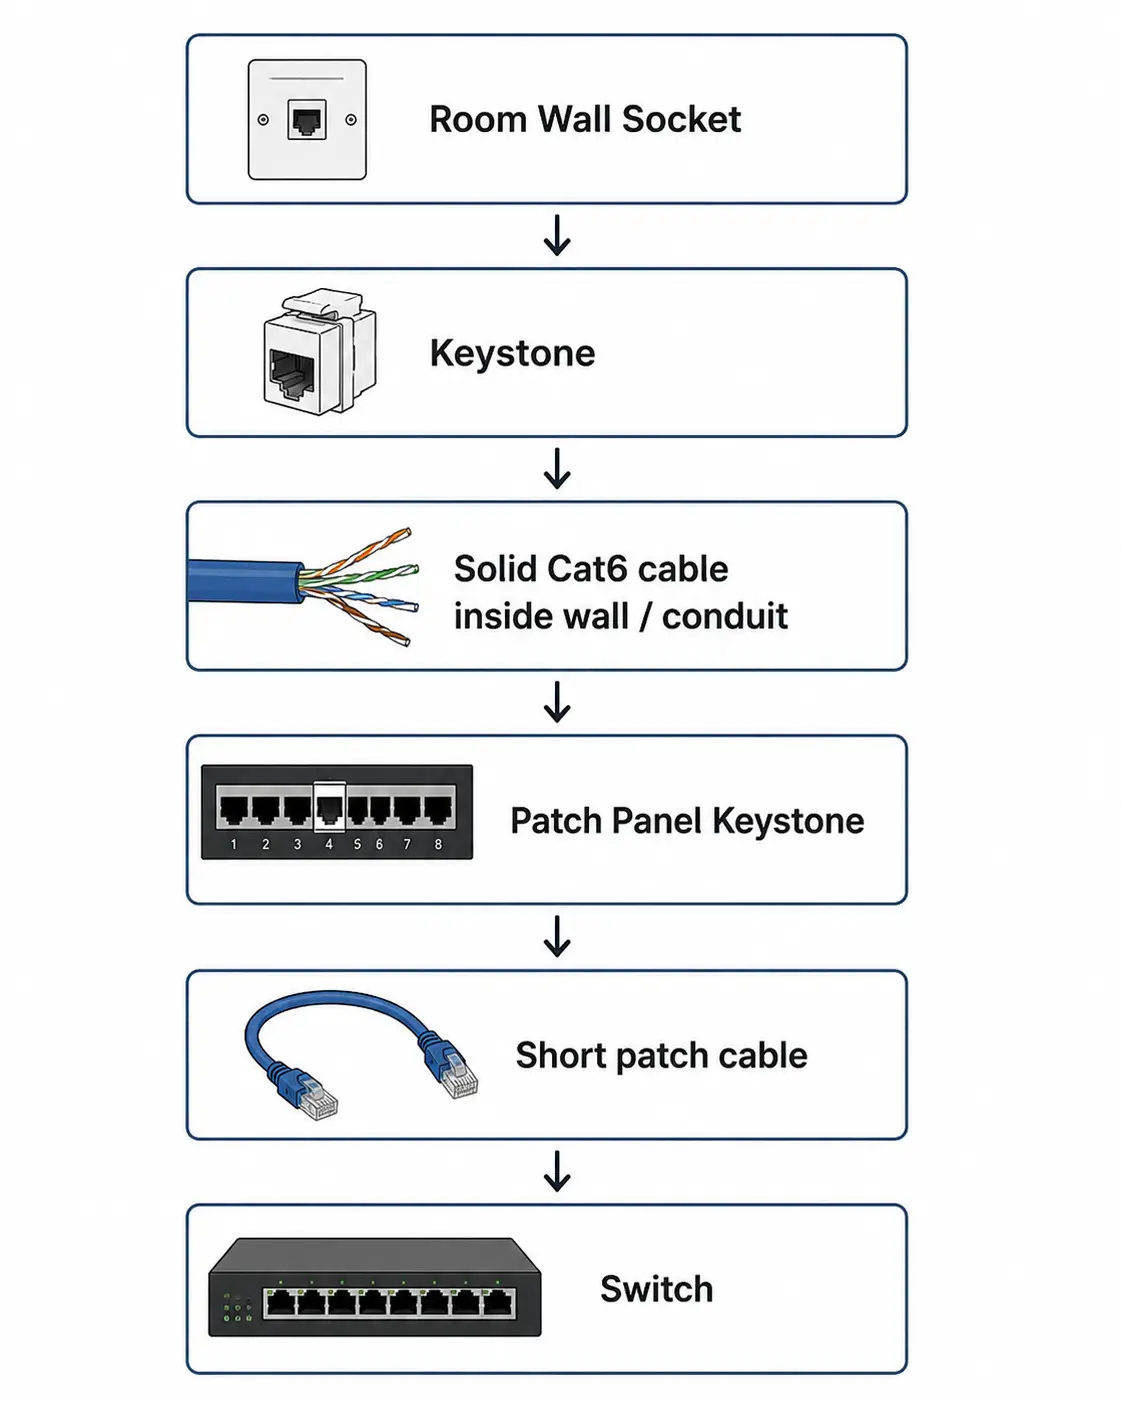
Keystone jack: You punch the cable into a small modular jack that clicks into a wall plate or patch panel. The keystone stays fixed, and you use a short patch cable from the keystone to the device.
I use RJ45 plugs for temporary cables between devices or for short runs. For example, if you need a 2-meter cable from a switch to a NAS, crimp an RJ45 and you are done. RJ45 plugs are usually harder to terminate and need a crimper.
For permanent wiring — cables that run inside walls — keystones are better, as long as they are fixed properly in a wall plate or patch panel. This way, the in-wall cable stays stable and protected. When you want to connect something, you simply plug a normal Ethernet patch cable into the keystone.
If you terminate permanent cables with RJ45 plugs, every change means moving the actual cable that sits inside the wall. Over time, this can damage it. If you already terminated with RJ45 and do not want to cut the cable shorter to install a keystone, you can use an RJ45 coupler. I did this for my cameras because the cable was already trimmed and I did not want it to become any shorter.
In general: use a patch panel when many cables meet in one place, like a network closet. Use a wall plate when a cable ends in a room. Use a direct cable only when the device is very close to the switch, like a NAS on the same shelf.
Planning for Fiber Before the ISP Arrives
Most people do not think about this until the ISP technician shows up.The fiber company — in my case, Nova (EON) — installs an ONT (Optical Network Terminal) where the fiber enters the house. Then they connect it to their router. If you have not planned the path, the ONT ends up in a random spot and you have cables running across the ceiling to get it to your equipment.
I avoided this by pre-installing a conduit from the street entry pointhrough a pre-installed conduit that runs from the building exterior gate through my driveway, then the staircase and then my apartment through the wall to where my rack is. The conduit is just a plastic tube inside the wall. When the ISP technician came, they pulled the fiber through the conduit and placed the ONT right next to my rack. No drilling, no visible cables outside
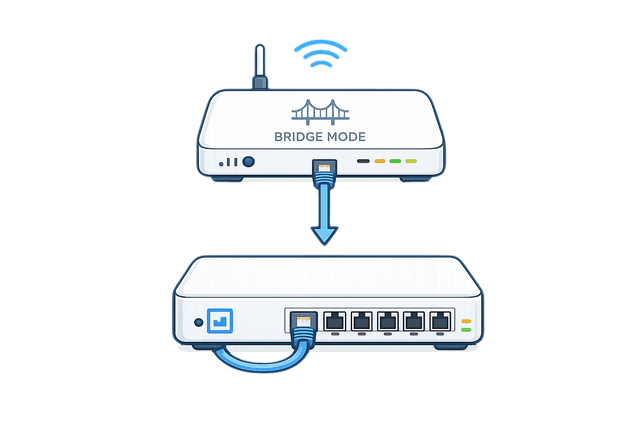
The result: fiber enters the building, goes through the conduit, reaches the ONT, connects to the Nova router in bridge mode, and into the UCG. Clean, invisible, no exposed cable.
If you do not plan this, you end up with one of two problems: either the technician drills wherever is convenient and runs visible cable, or you need to do the conduit work yourself later — which usually means drilling through finished walls.
My advice: put in more conduits than you think you need. Even if you do not pull a cable through them now, having a clear path from point A to point B will save you a lot of trouble later. I left a few empty conduits in places where I might want to run something in the future. Those empty tubes cost almost nothing and might save me from opening a wall one day.
How I Ran Cables Through the House
The actual cable routing happened before the walls were plastered. Here is what I did step by step.
Map every endpoint: Every access point location, every camera position, every room that needs an ethernet port. I drew this on the floor plans before anything else.
Decide where cables will meet: All my cables converge in two points. The main network closet on the first floor and a second smaller point for some camera cables. Having two points was not the original plan — it happened because of how the camera positions worked out and where the conduits could reach. If I could do it again, I would try harder to keep everything in one place.
Plan the routes: Each cable needs a path from the endpoint to the central point. Through walls, ceilings, or conduits. I kept network cables away from power cables where possible — running them in parallel through the same conduit can cause interference, especially at higher speeds.
Pull the cables: Before the walls were sealed. This is the easy part if the conduits are already in place. If not, you route cables through open walls and ceilings while you still can.
Leave extra length: At every termination point, I left extra cable. At the patch panel end, enough slack to comfortably terminate. At the wall socket end, enough to reterminate if I make a mistake. Cutting a cable too short is a mistake you cannot fix without pulling new cable.
Label both ends: Every cable gets a label on both ends before the walls are sealed. Which room, which device, which port on the patch panel. This is boring work that saves a lot of frustration later. When you have 20+ cables meeting at a patch panel and they are all the same color, labels are the only way to know what goes where.
Electrical Wiring for Smart Switches: Live and Neutral
If you want to use smart relays or smart switches behind your light switches — like the Shelly devices I use — you need both the live wire and the neutral wire available at the switch box.
In many traditional electrical installations, the switch box only has the live wire. The neutral goes straight to the light fixture. That works fine for a dumb switch — it just interrupts the live wire. But smart relays need both. They are small computers that need constant power to stay on, communicate over Wi-Fi, and respond to commands. Without a neutral wire, they cannot power themselves.
If you are building a new house or renovating, tell your electrician to run the neutral wire to every light switch box. This is a trivial change during construction — just one extra wire in the same conduit. But if you try to do it after the walls are finished, you are looking at opening walls, pulling new cable, and patching everything up again.
I planned for this from the start, which made installing Shelly Pro 4PM relays and other smart switches straightforward. Every switch box in my house has live and neutral. If I had not done this, half of my smart home automations would not work — or I would have been stuck with expensive workarounds like smart switches that try to work without a neutral by leaking a small current through the light, which causes flickering and compatibility issues.
The rule is simple: if there is any chance you will want smart switches in the future, run the neutral wire to every switch box now. It costs almost nothing during construction and it is nearly impossible to add later without opening walls.
Rack or Hidden Cabinet?
Not every setup needs a visible rack. I have two network points in the house.
The main rack: is in a closet on the first floor. This is where the UCG router, the switches, the patch panel,the isp router, the NAS, and the Pi sit. I use a small 3U table rack, about 35 cm tall. It sits on the plasterboard ceiling. I have an access panel that I can open and access all ports and equipment. 3U is enough for a patch panel, a switch or two, and some space for cable management. The router and Pi sit on a shelf int the rack. The NAS, the isp router and my ups sit next to it.
The second point: is a bigger, a 4U wall mounted rack for the cameras, nvr, access points, ups and switch in the basement.
Both visible and hidden can work. Besides heat management, the rest is personal preference. Whether you like the equipment to be visible and easily accessible.
What I Would Do Differently
Run even more cables: I ran enough for what I needed, but technology changes. Having a spare cable to each room costs almost nothing during construction and saves a lot of work if you ever need it. I have a few spots where I wish I had an extra run.
Label cables from the start: I the cables using a tester, which was a tidous process considering some of them run in different floors. It would be way easier to have them labeled from the start.
Cabling is the physical layer, VLANs are the logical layer. Get both right and the network is easy to maintain.
TL;DR
Physical cabling is the one thing you cannot easily change later. Plan it before the walls are sealed.
Use solid-core Cat6 for in-wall runs. Cat6 is enough for a home network. Cat6A is thicker, harder to work with, and more expensive — and usually no home device needs 10 Gbps at 100 meters.
Terminate permanent cables with keystone jacks, not RJ45 plugs. They are easier, more reliable, and do not strain the wall cable.
Use a patch panel where many cables meet. Use wall plates where a cable ends in a room.
Pre-install conduits for fiber and cable paths. They cost almost nothing and save you from drilling through finished walls.
Label both ends of every cable when installing it. You will not remember which is which later.
Run neutral wire to every light switch box. Smart relays like Shelly need both live and neutral to work — and adding neutral later means opening finished walls.
Plan the ISP fiber entry path before the ISP arrives. Do not let the technician decide where to drill.
This is part of my Building My Smart Home series — where I document everything I built, what worked, what broke, and what I learned. Follow along for practical infrastructure posts aimed at developers who want to build real systems.