Why I Started Building a Smart Home ?
I was building a new house, and I wanted to make it smart. I always hated pressing each shutter switch for 10 seconds one by one in the morning. And since I had total control and time ahead of me, I wanted to make it as good as possible.
I also wanted to have internet on both floors of the house and in the basement where we made a small home gym where there is no cell phone coverage.
I did not wait for the new house to begin. I started building my home lab step by step in my old house. I found that in order to connect a lot of IoT (smart) devices via wifi with different access points, it would be a good idea to have a good router.
I did my research and I bought a UCG Ultra and a U6+ access point. I did not want to mess with other protocols like Matter, Zigbee, etc., since I wanted something very simple. To control the shutters, the water heater, and some lights.
But, I am a software engineer. I build software and systems for a living. But I realized I had never actually built the system I depend on every single day — my home network. Going deeper into the rabbit hole I discovered home labbing.
What Is a Smart Home?
A home lab is any setup at home where you run real infrastructure — networking, storage, services, automation — and learn from maintaining it. It is your own environment where things break, and you are the one who fixes them. The new house gave me the chance to start fresh with clean cabling, proper VLANs, and real infrastructure. I took everything I had learned in the old house and moved it over.
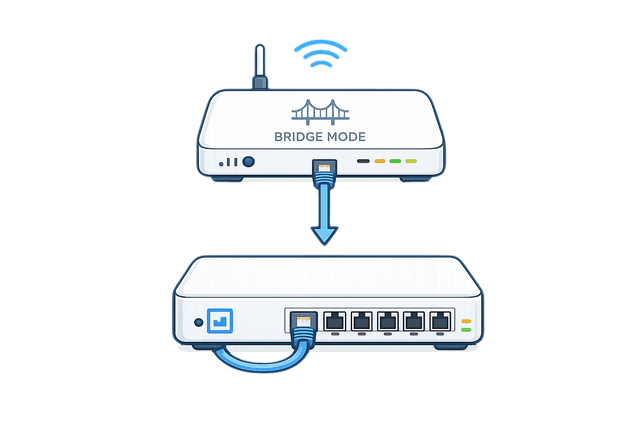
For me, it started with the UCG router in bridge mode with the ISP router. Then, I repurposed some old hardware I had to build a home lab PC running TrueNAS and some containers. Then I got a Raspberry Pi to run AdGuard Home and all the networking shenanigans, protecting my whole network from trackers and ads.
Then I got my first managed switch, a new AOOSTAR mini PC to be a NAS server and some NAS hard drives etc etc. Each piece solved a real problem, and each piece taught me something I could not have learned from a tutorial alone. Before I moved to the new house, I installed the lab there and enabled access via vpn and grew it from there.
My Setup
Here is what my home lab looks like today:
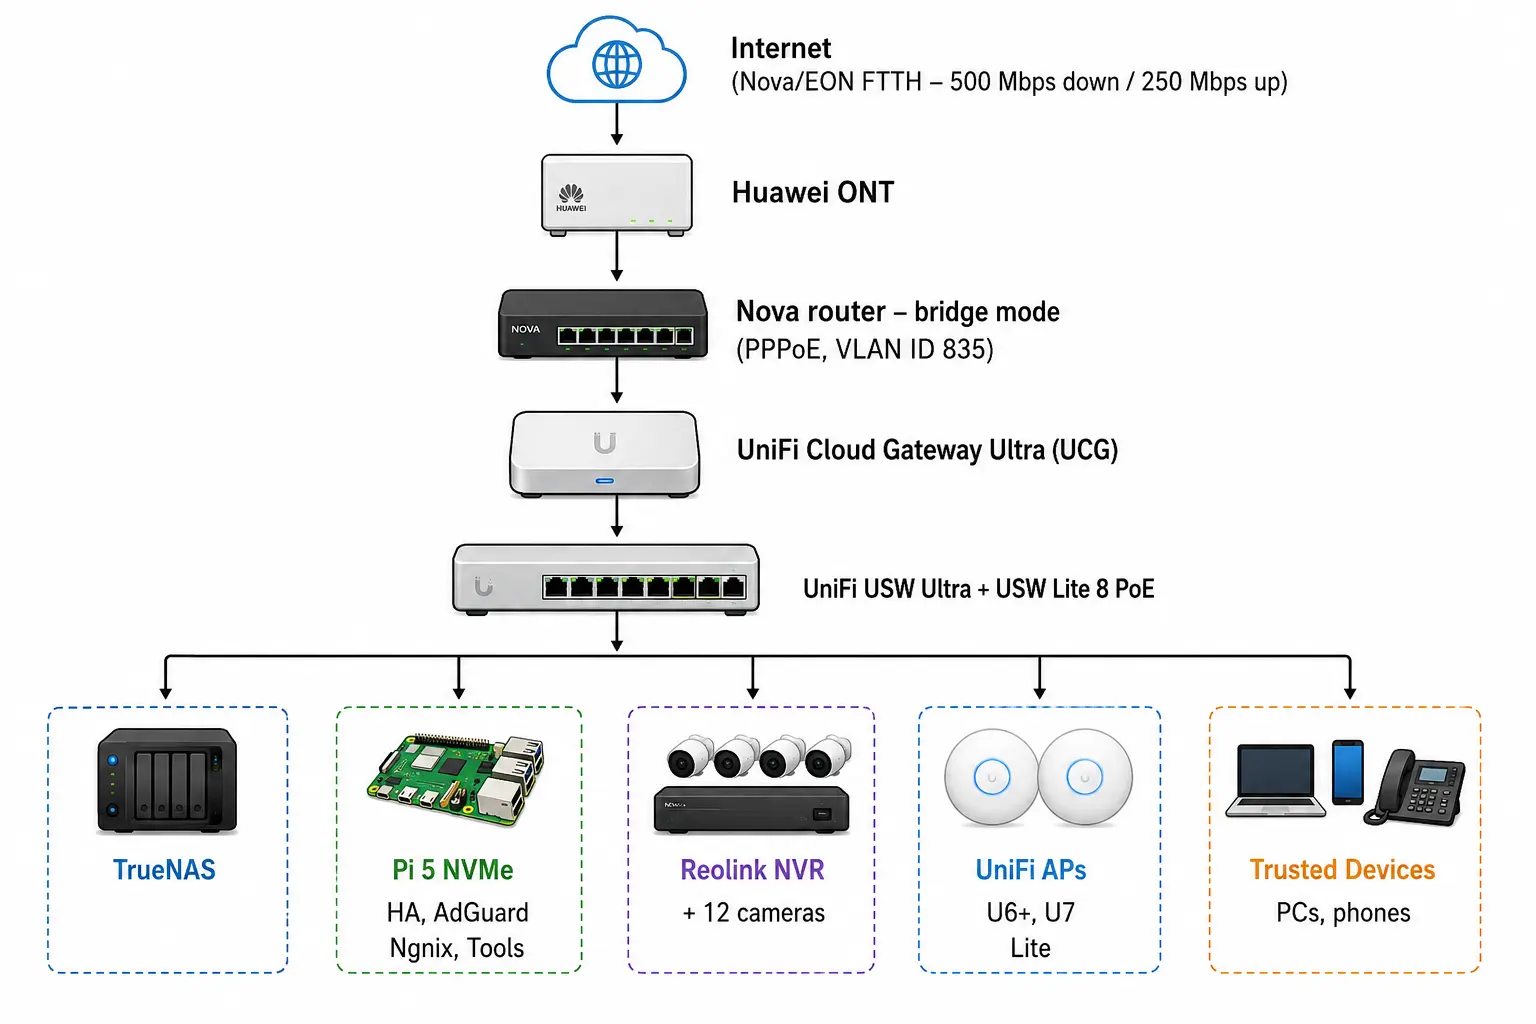
Network: UniFi Cloud Gateway Ultra as the main router and firewall. Multiple UniFi switches — and access points.
VLANs: Six separate networks:
VLAN | What lives there |
Management | UCG, switches, APs |
Trusted | Laptops, phones, PCs |
IoT | Shelly devices, ACs, TVs |
Services | Raspberry Pi 5, TrueNAS |
Surveillance | Reolink NVR + 12 cameras |
Guest | Internet-only with QoS Rules |
Mini PC: A Raspberry Pi 5 with NVMe running Docker Compose — Home Assistant, AdGuard Home, Nginx Proxy Manager, Portainer, Dozzle, Homepage dashboard, and a FreeDNS DDNS updater.
Storage: TrueNAS on an AOOSTAR mini PC with 16+ GB RAM. Datasets for media, family storage, personal documents, and backups.
Cameras: 12 Reolink cameras with an NVR, fully isolated in their own VLAN with no internet access.
Remote access: WireGuard VPNrunning on the UCG. Dynamic DNS via FreeDNS so I can connect from anywhere.
Smart home: Home Assistant that runs on Pi5 controlling ~15–20 Shelly devices (lights, shutters and home appliances), ACs, dehumidifiers, LED strips, automated ventilation schedules and showing the cameras feed.
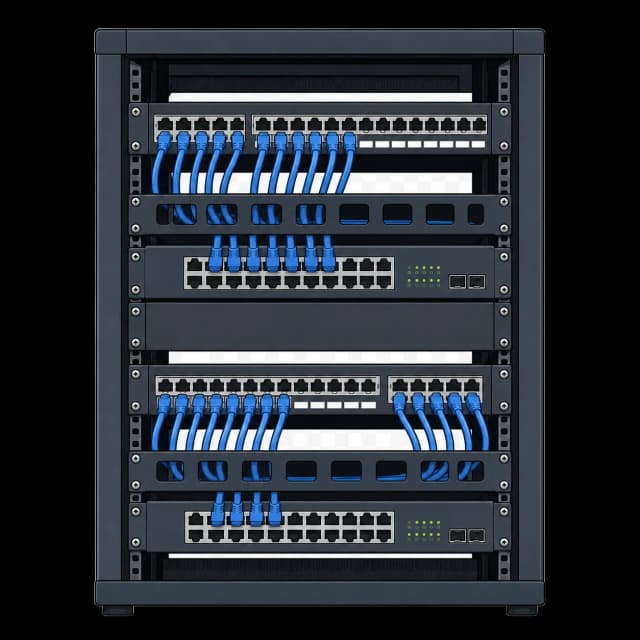
Physical layer: throughout the house. Patch panels, Cat6A keystones, RJ45 terminations, wall RJ45 outlets, and two racks.
This did not happen overnight. It started from the UCG router and it has been almost a year of extending it.
The Problems It Solves
After all those efforts, my home lab is helping me with the following.
Unreliable network: Devices dropping, interference and very hard to diagnose issues. I needed a managed network where I could see what was happening easily.
No separation between devices: My security cameras, smart plugs, guest phones, and work laptop were all on the same flat network. One compromised cheap IoT device could have access to anyone in the network.
No proper storage: Files scattered across external drives and cloud accounts. No backups. No shared family storage. No media server.
No remote access: When I was away from home, I had no way to reach home network to see what's going on, use my printer, my cameras, or my smart home. The only way was to use an external service and access it via their servers. But that meant that my IoT devices would have access to the internet with all the security implications this has
No DNS control: Ads, trackers, and telemetry from every device on the network. I wanted DNS-level filtering that covered the whole house, not just one browser.
Smart home dependent on cloud: Devices that stopped working when the internet went down. I wanted local control — no cloud required.
What I Learned
Every one of these problems led to a piece of infrastructure that taught me something new.
Lessons About Networking
Before this project, I understood networking at the application layer. HTTP, DNS lookups, maybe some basic TCP. The home lab forced me to understand layers 1 through 4.
VLANs and subnets: I learned how to segment a network into isolated broadcast domains. How trunk ports carry tagged traffic. How inter-VLAN routing works and why you need firewall rules to control it.
Firewall rules: I learned to think about traffic direction — which device initiates the connection, which port it targets, and why "allow established/related" matters. My IoT devices can talk to Home Assistant, but they cannot reach the internet or any other VLAN.
Bridge mode and PPPoE: I learned what it means to put an ISP router in bridge mode , how PPPoE authentication works, and what CG-NAT is.
DNS: I learned how DNS resolution actually works in a home network. AdGuard Home on my Pi handles every DNS query for every device. I can block domains, see query logs, assign local addresses to different apps running in my home network and troubleshoot connectivity issues from one dashboard.
Lessons About Cabling
Building a new house from scratch gave me something most people never get — walls that are not finished yet. Before anything was sealed, I planned every cable run. Where each access point would go on the ceiling. Where cameras would cover the corners and the entrance. Where the rack would sit. I ran Cat6 to every room, both floors, the basement gym, and the roof. I also pre-installed a conduit from the fiber entry point through the building to each apartment with the rest of the cabling. When the fiber company arrived, they followed the conduit. No drilling, no visible cables on the outside wall.
I go into the full details in the cabling article — Cat6 vs Cat6A, keystone vs RJ45, patch panel vs direct run, rack vs hidden cabinet.
Lessons About Linux and Servers
The Raspberry Pi 5 runs all my services via Docker Compose and my NAS is based on ubuntu. Setting this up improved my knowledge of the following:
Docker and containers: Real multi-container deployments, monitoring, security and updates.
Linux administration: SSH, systemd, file permissions, cron jobs, log rotation, storage mounts.
Reverse proxy and SSLL: Nginx Proxy Manager handles routing for all my services. I learned how reverse proxies work, how Let's Encrypt issues certificates, and how to expose services safely through a single entry point.
Backups and reliability: I learned how to take automated backups, snapshots and storing them both locally and in the cloud.
Lessons About Hardware Selection
The question I get asked the most: what do I need to buy? Less than you think — but the right choices matter.
Raspberry Pi 5 + NVMe: This runs the whole Docker stack. Home Assistant, AdGuard, Nginx, all of it. The Pi 5 is fast enough. But an old or a mini pc will do as well.
NAS box: I use an AOOSTAR mini PC for TrueNAS. It is purpose-built for this — small, low power, fits multiple drives.
HDDs for storage: Use NAS-rated drives, not desktop drives. NAS drives are built for 24/7 operation. The price difference is small compared to what you are putting on them. I got a pair of Seagate IronWolf Pro 6TB and I have them mirrored.
You do not need all of this from day one. A old pc running is already a complete first step. Run it for a month, see what you actually need next, then add it.
Lessons About Security
Network segmentation is critical: It's good practice to cameras and smart devices on their own VLAN with no limited if at all internet access. IoT devices with known vulnerabilities should never be on the same network as your work laptop.
Firewall rules require thinking about traffic flow: You cannot just "allow all" between VLANs and call it segmented. I had to define exactly what talks to what, on which ports, in which direction.
VPN over port forwarding: I never expose services directly to the internet. WireGuard gives me encrypted access to my entire network from anywhere. No open ports, no attack surface
DNS filtering is a security layer: AdGuard Home blocks known malware domains, phishing attempts, and telemetry for every device on the network — even the ones that don't support browser extensions. These are not theoretical concepts anymore. They are decisions I made, implemented, and maintain.
How It Made Me a Better Developer
I write software for a living. But before this project, I treated infrastructure as someone else's problem. The home lab changed that.
When I deploy something to a cloud provider today, I understand what is underneath. The networking, the DNS, the containers, the storage mounts. I have configured all of those things myself. They are not a black box anymore. When something breaks in production, I debug in layers automatically now. Is it DNS? A firewall rule? A container that restarted? A volume that did not mount? I ask those questions because I have solved all of them at home.
Practically: I have a full platform at home. Need a database for a side project? Two minutes. Need to expose a local service to the internet for testing? VPN handles it. Need to run a long background job without touching my laptop? The Pi is there. The home lab is my personal development environment.
My Only Regret
I should had Set up a Pi as early as possible. I wish I had bought a pi and started experimenting with apps year earlier. An easy first project is to flush run adguard on pihole on the pi and use it as the dns in your network. The result is network-wide filtering for every device in your network. It's a rewarding project and an easy way to get your feet wet in starting you own home lab.
This is part of my Building My Smart Home series — where I document everything I built, what worked, what broke, and what I learned. Follow along for practical infrastructure posts aimed at developers who want to build real systems.