You Already Use VLANs Without Knowing It
VLANs may sound like an unfamiliar networking buzzword, but many people use them every day without knowing it.
In an office, hotel, or university, you may see separate Wi-Fi networks for employees, guests, and smart devices. You may see several networks available:
Company Wi-Fi
Guest Wi-Fi
Staff Wi-Fi
IoT or device Wi-Fi
They often use the same access points, switches, cables, and internet connection. But have you ever wondered why guests can access the internet but cannot reach company computers, printers, or internal services?
Behind those different Wi-Fi names are often VLANs. VLAN allows network administrators to use the same physical infrastructure while separating devices into different logical networks. Each network can have different permissions, security rules, bandwidth limits, and access to internal resources.
Why I Did Not Want One Flat Network In My Home
Before VLANs, every device in my house was on the same network. My laptop, my security cameras, my brother's phone, the guest phones at home, the cheap smart plugs — all sharing one subnet, all able to communicate with each other.
That is how most home networks work. The ISP router creates one network, everything connects to it, and nobody thinks about it until something goes wrong.
I started thinking about this seriously when I installed my first Shelly and went to its configuration page at the local IP. I saw an interface with no authentication and realised that anything on this network can access it. Any guest phone. Any compromised IoT device. The Shelly could see my NAS, my laptop, my Home Assistant instance.
And my 12 security cameras were on the same flat network too with their RTSP streams open. So I decided to separate them.
What Is a VLAN?
A VLAN — Virtual Local Area Network — splits one physical network into multiple isolated logical networks. Think of it like rooms in a house. Without VLANs, your entire network is one big open room — everyone is together and can communicate. With VLANs, you add walls and doors. The cameras are in one room, the smart plugs in another, your personal devices in a third. The only way to get between rooms is through the router, which acts as a security guard checking whether you are allowed through.
Each VLAN gets its own subnet, its own DHCP, and its own broadcast domain. Traffic between VLANs has to go through the router where firewall rules decide what gets through.
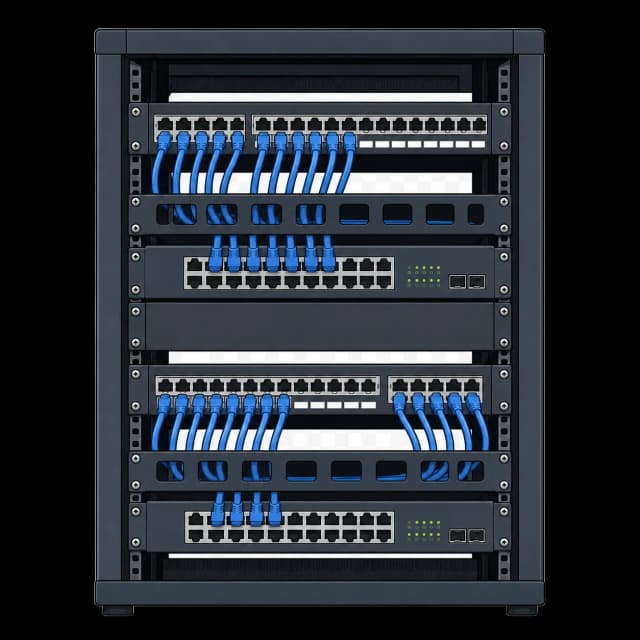
The same physical Cat6 cables carry traffic for all VLANs. The switches tag each packet with a VLAN ID so they know which network it belongs to. This is why you need managed switches — unmanaged ones cannot tag traffic.
In UniFi, creating a VLAN takes about 30 seconds. You define a network, assign it a VLAN ID and a subnet, and then assign switch ports or Wi-Fi SSIDs to that network. The UCG handles routing between VLANs and the firewall rules that control it.
My Network Goals
Before I created any VLANs, I wrote down what I wanted:
IoT devices cannot reach my personal devices. A compromised Shelly relay should never be able to see my laptop or phone.
Cameras cannot access the internet and should be separated from IoT.
There is no reason for my home footage to go through someone else's server. And a compromised smart plug should not be able to see my camera feed by accessing the RTSP stream.
Services should be reachable from my devices but not from guests or IoT.I want to access my NAS and Home Assistant from my laptop, but a guest phone should not even know they exist.
Guest devices get internet and nothing else. No access to any internal service, no scanning, no discovery and limit in the bandwidth
One DNS server for everything. All VLANs use my Raspberry Pi 5 running AdGuard Home. This way the entire network has ad blocking and internal DNS for local addresses.
Management devices are isolated. The router, switches, and access points should not be accessible from random devices on the network.
These goals directly shaped my VLAN layout.
My VLAN Layout

Name | Subnet | Purpose | Devices |
|---|---|---|---|
Management | 192.168.1.0/24 | Network infrastructure | UCG Ultra, switches, APs |
Trusted | 192.168.10.0/24 | Personal and family devices | Laptops, phones, PCs, TVs |
IoT | 192.168.20.0/24 | Smart home devices | Shelly relays, ACs, smart devices, TVs |
Services | 192.168.30.0/24 | Internal infrastructure | Raspberry Pi 5, TrueNAS |
Surveillance | 192.168.40.0/24 | Cameras and recording | Reolink NVR + κάμερες |
Guest | 192.168.120.0/24 | Internet-only access | Guest phones, gym visitors |
Management Network
This is where the network infrastructure lives. The UCG Ultra, the UniFi switches, and the access points. I want the network infrastructure separated from everything else. A guest phone should not be able to reach the admin panel of my router. An IoT device should not be able to mess with the AP firmware.
In practice, I access the management network from my trusted devices when I need to configure something. The UCG's UniFi console is available from Trusted VLAN, but not from IoT, Guest, or Surveillance.
VLAN 1 is the default on most network equipment. I kept it because UniFi devices use it out of the box — plug in a new AP or switch and it shows up in the controller automatically.
Trusted Devices Network
This is the main home network. My laptop, my brother's laptop, our phones and the PCs. These are the devices we use daily, and they need the most access.
Trusted devices can:
Access the internet freely- Reach services on Services VLAN (NAS, Home Assistant, Pi dashboard)- Access the management network for configuration
Connect to cameras through the NVR interface
Trusted devices cannot:
Be reached by IoT devices
Be reached by guest devices
Be reached by cameras
Services Network
This is where my internal services run. Two devices live here:
Raspberry Pi 5: runs Docker Compose with Home Assistant, AdGuard Home, Nginx Proxy Manager, Portainer, Dozzle, Homepage dashboard, and a FreeDNS DDNS updater.
TrueNAS: the NAS running on an AOOSTAR mini PC with storage for media, family files, personal documents, and backups. It also runs as a media server with Jellyfin.
I keep Services isolated so the Pi and NAS are not exposed to IoT, cameras, or guests. Only my trusted devices can connect to Services VLAN. The services can still reach the internet for updates.
Why not put the Pi and NAS on the Trusted VLAN? Because services are servers — they listen on ports, accept connections, and run 24/7. Keeping them on their own network means I can write firewall rules specific to them without affecting my personal devices.
Home Assistant on the Pi is the bridge between VLANs. It sits on Services VLAN but needs to talk to IoT devices on IoT VLAN. The firewall rules that enable this are specific and controlled — more on that in the firewall section. TVs on the IoT VLAN also have access to the NAS running Jellyfin for media streaming.
IoT Network
Every smart home device lives here. Shelly relays, air conditioners, dehumidifiers, smart plugs, TVs, and smart switches.
Some of them are cheap, their firmware is often closed-source, their update cycles are unpredictable, and many of them try to phone home to cloud servers.
On IoT VLAN, devices can:
Talk to Home Assistant (so they can report state and receive commands)
Reach DNS on the Pi for name resolution
Reach the internet only when strictly necessary
IoT devices cannot:
Reach any device on Trusted VLAN
Reach the NAS
Access the management network
See or reach cameras
Home Assistant acts as the controller. It sits on Services VLAN and connects to each smart device to send commands. TVs can also access Jellyfin on the NAS for media streaming. These firewall rules are the only allowed paths between IoT and Services VLANs.
The IoT VLAN has its own Wi-Fi SSID. The frequency is set to 2.4 GHz only and the password is IoT friendly. When I set up a new device, I connect it to this SSID and it lands on IoT VLAN automatically. No manual port assignment needed.
Surveillance Network
Cameras and an NVR. All connected via PoE through the Cat6 cabling I ran during construction. This VLAN is the most locked-down network in my house.
Cameras cannot:
Access the internet (completely blocked)- Reach any other VLAN- Resolve external DNS- Communicate with anything outside the Surveillance VLAN
The NVR records everything locally. The cameras only talk to the NVR and that is it. Why? Cameras are high-risk devices. Known vulnerabilities, minimal updates, and they record your home. If one gets compromised and has internet access, it could stream your footage to someone else. If it has LAN access, it becomes a way into other devices.
By blocking internet entirely, even a compromised camera cannot send anything out. It can only talk to other devices on the Surveillance VLAN — which are other cameras and the NVR.
When I want to view cameras, I either:
Access the NVR or the Cameras App (that is configured to run locally only) from a trusted device on Trusted VLAN (a specific firewall rule allows this)
View the camera feeds through Home Assistant, which proxies the streams.
Connect via WireGuard VPN when I am away from home, which puts me on the network as if I were physically there.
I go deeper into camera placement, cable runs, and the NVR setup in the camera article.
Guest Network
Guests have only Internet access.
Friends come to the house often and need Wi-Fi. But they should not see my NAS, my cameras, my Home Assistant, or any internal service. They should get internet and nothing more. The Guest VLAN provides exactly that:
Internet access: allowed
Access to any other VLAN: blocked
Speed: limited with QoS rules so guests cannot saturate my connection
The QoS rules cap bandwidth per guest client. My connection is 500/250 Mbps. I do not want a guest downloading a large file to degrade the video call I am on upstairs. The limits are generous enough for normal use — browsing, streaming, social media — but prevent any single device from dominating the network.
DNS Across VLANs
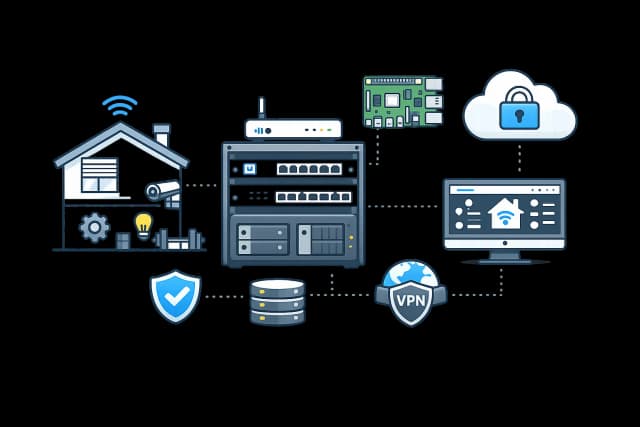
Every VLAN uses my Raspberry Pi 5 as the DNS server. The Pi runs AdGuard Home — a DNS-level ad blocker and query logger.
This means every device on every network — trusted, IoT, cameras, guests — sends its DNS queries to the Pi. AdGuard blocks ads, trackers, malware domains, and telemetry for the entire house. No per-device configuration or browser extensions needed.
For this to work across VLANs, I needed a firewall rule that allows DNS traffic from all VLANs (except cameras) to the Pi's IP and specific port on Services VLAN. Without this rule, devices on other VLANs would be unable to resolve any domain name — the internet would appear "broken" even though connectivity is fine.

The DHCP configuration for each VLAN points to the Pi's IP as the DNS server. When a device connects and gets an IP via DHCP, it also gets the Pi as its DNS.
AdGuard also gives me visibility. I can see which devices are making which queries. If a Shelly device suddenly starts resolving suspicious domains, I will see it in the logs.
Basic Firewall Rules
Firewall rules are what make VLANs useful. Without them, the router just routes traffic between VLANs freely — no point in separating anything. In UniFi, you define rules for traffic going from one zone to another. Block everything by default, then allow what you need. Here are my rules:
Allow: IoT → Home Assistant IoT devices need to push state updates to Home Assistant. They connect to the Pi on the specific port (the HA web interface and API). This rule allows only that specific port from IoT VLAN to the Pi's IP on Services VLAN .
Allow: Home Assistant → Smart devices Home Assistant needs to send commands to Shelly relays and read their status. It can connect to any device on IoT network.
Allow: All VLANs → Pi DNS (port 53) Every VLAN (except Surveillance) can reach the Pi on port 53 for DNS resolution. Without this, no device can browse the internet because it cannot resolve domain names.
Allow: Trusted → Services (all) My personal devices on Trusted VLAN can reach anything on Services VLAN. I access Home Assistant, the NAS web interface, Portainer, Nginx, and other dashboards freely from my laptop.
Allow: Trusted → NVR (specific ports) From Trusted VLAN, I can access the NVR interface to view live cameras and recordings.
Block: Surveillance → Internet All traffic from Surveillance VLAN to the WAN is dropped. Cameras never talk to the internet. This is an explicit deny rule that overrides the default "allow internet" policy.
Block: Guest → All internal Everything from Guest VLAN to any other RFC1918 address is blocked. Guests can only reach the internet. They cannot ping, scan, or access anything internal.
Block: Isolate IoT Traffic from VLAN 20 to any other VLAN is blocked. IoT devices cannot reach personal devices. Even if a smart plug is compromised, it cannot scan for my laptop.
The default rule By default, I deny traffic between VLANs unless a specific rule allows it. This is the zero-trust approach — nothing talks to anything unless I say so. Then I add allow rules for the specific paths I need. This way, if I forget to block something, it is blocked by default.
Established and related traffic One important rule: I allow established and related connections in all directions. This means if a device on Trusted VLAN initiates a connection to a service on Services VLAN, the response packets are allowed back. Without this, I would need to write rules for both directions of every allowed connection. The "established/related" rule handles return traffic automatically. It only allows traffic from connections that were already started and permitted. No new incoming connections — just return traffic. This is part of my Building My Smart Home series — where I document everything I built, what worked, what broke, and what I learned. Follow along for practical infrastructure posts aimed at developers who want to build real systems.